Creating Animations
Introduction
Animations can be used to create movement, transitions and have your views visually respond to user interaction. This tutorial explains how to create animations in XUML as well as in code. We'll also explain how to create state animations that can be used to animate between different view states.Preparing the Scene
We'll start by setting up a simple example scene that we will add animations to.AnimationExample.xml
<AnimationExample>
    <UserInterace>
        <Group Spacing="10">
            <Button Text="Animate" Click="AnimateClick" />
            <Region Id="AnimatedRegion" Width="100" Height="100" BackgroundColor="Red" />
        </Group>
    </UserInterace>
    <EventSystem />
</AnimationExample>
AnimationExample.cs
public class AnimationExample : View
{
    public void AnimateClick()
    {
        // TODO do animations
    }
}
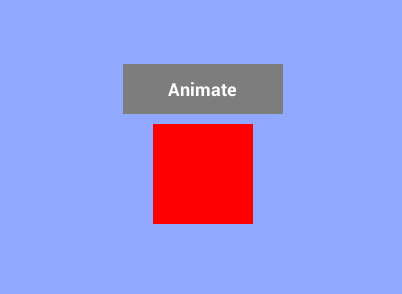
The scene displays a button with a red square region underneath. Next we'll try make the square move when the user clicks on the button.
ViewAnimation
To create an animation in XUML we can use the ViewAnimation view:AnimationExample.xml
<AnimationExample>
    ...
    <ViewAnimation Id="MyAnimation">
    </ViewAnimation>
</AnimationExample>
We have given our animation the ID MyAnimation that we can use to reference it in our view model:
AnimationExample.cs
public class AnimationExample : View
{
    public ViewAnimation MyAnimation;

    public void AnimateClick()
    {
        MyAnimation.StartAnimation();
    }
}
As you can see we use the ViewAnimation reference to start the animation using the StartAnimation method. The ViewAnimation class contains the following methods:
| Method | Description |
|---|---|
| StartAnimation | Starts the animation. |
| StopAnimation | Stops the animation. Called when the animation is not to continue anymore. Note that the animated views doesn't reset to its initial state when the animation is stopped. |
| ResetAnimation | Resets the animation to its initial state but doesn't stop the animation. |
| ResetAndStopAnimation | Resets the animation to its initial state and stops the animation. |
| ReverseAnimation | Makes the animation run in reverse back to its initial state. |
| PauseAnimation | Pauses the animation. |
| ResumeAnimation | Resumes a paused animation. |
| SetAnimationTarget | Changes the animation target view. |
Right now the animation doesn't do anything. To define what is to be animated and how we can add an Animate view.
Animate
The Animate view animates a view field. We will use it to animate the Offset of the red square:
<AnimationExample>
    ...
    <ViewAnimation Id="MyAnimation">
        <Animate Field="AnimatedRegion.Offset" From="0,0,0" To="300,0,0" Duration="750ms" />
    </ViewAnimation>
</AnimationExample>
There are a few important things going on here:
-
The first thing we do is to set the field that is to be animated:
<Animate Field="AnimatedRegion.Offset" ...
We reference the region by its ID and specify that the Offset field is to be animated.
-
Then we specify the values the animation is to interpolate between:
<Animate ... From="0,0,0" To="300,0,0" ...
Note that you can remove the From value and the animation will use the field's current value as From value when the animation is started.
-
Lastly we set the duration of the animation:
<Animate ... Duration="750ms" />
The duration can be specified in milliseconds (ms), seconds (s) or minutes (min).
Here is a full list of fields we can set on the Animate view:
| Field | Description |
|---|---|
| EasingFunction | Easing function to be used when interpolating between From and To values. |
| AutoReset | Indicates that the animation should be reset to its startnig position when completed (false by default). |
| AutoReverse | Indicates if the animation should be reversed when the animation is completed. |
| Field | Path to the view field that should be animated. |
| From | The starting value to be set when the animation starts. |
| To | The end value to be interpolated to during animation. |
| ReverseSpeed | The speed the animation should have when run in reverse (percentage of original speed). |
| Duration | Duration of the animation. |
| StartOffset | Delay in the interpolation of values after the animation is started. |
Before we continue we can try setting AutoReverse to make the animation a little more interesting:
<AnimationExample>
    ...
    <ViewAnimation Id="MyAnimation">
        <Animate Field="AnimatedRegion.Offset" From="0,0,0" To="300,0,0" Duration="750ms"
                 AutoReverse="True" />
    </ViewAnimation>
</AnimationExample>
Easing Functions
Easing functions defines the rate of change of the view field value over time. By default values are interpolated in a linear fashion. Sometimes you want to utilize other forms of easing to, e.g. make the animation seem more smooth or interesting. Let's change the easing function of our animation:
<AnimationExample>
    ...
    <ViewAnimation Id="MyAnimation">
        <Animate Field="AnimatedRegion.Offset" From="0,0,0" To="300,0,0" Duration="750ms"
                 AutoReverse="True" EasingFunction="QuadraticEaseIn" />
    </ViewAnimation>
</AnimationExample>
For more details on easing functions I recommend checking out easings.net.
Animating Multiple Fields
To animate more than one field you can add more Animate. We can add one more to animate the color of the square:
<AnimationExample>
    ...
    <ViewAnimation Id="MyAnimation">
        <Animate Field="AnimatedRegion.Offset" From="0,0,0" To="300,0,0" Duration="750ms"
                 AutoReverse="True" EasingFunction="QuadraticEaseIn" />
        <Animate Field="AnimatedRegion.BackgroundColor" From="Red" To="Indigo" Duration="750ms"
                 AutoReverse="True" EasingFunction="QuadraticEaseIn" />
    </ViewAnimation>
</AnimationExample>
Finally we can animate the scale of the button. We end up with the following scene:
AnimationExample.xml
<AnimationExample>
    <UserInterace>
        <Group Spacing="10">
            <Button Id="AnimatedButton" Text="Animate" Click="AnimateClick" />
            <Region Id="AnimatedRegion" Width="100" Height="100" BackgroundColor="Red" />
        </Group>
    </UserInterace>
    <EventSystem />

    <ViewAnimation Id="MyAnimation">
        <Animate Field="AnimatedRegion.Offset" From="0,0,0" To="300,0,0" Duration="750ms"
                 AutoReverse="True" EasingFunction="QuadraticEaseIn" />
        <Animate Field="AnimatedRegion.BackgroundColor" From="Red" To="Indigo" Duration="750ms"
                 AutoReverse="True" EasingFunction="QuadraticEaseIn" />
        <Animate Field="AnimatedButton.Scale" From="1" To="0.7" Duration="250ms"
                 AutoReverse="True" EasingFunction="QuadraticEaseOut" />
    </ViewAnimation>
</AnimationExample>
That concludes the use of ViewAnimation to animate views. Next we take a look into the StateAnimations view that can be used to animate between view states.
State Animations
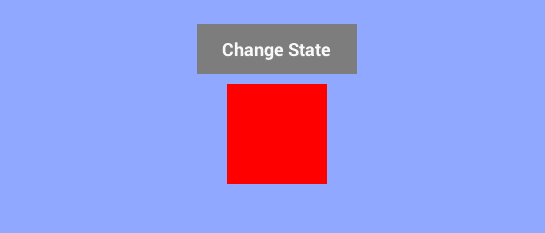
The StateAnimation view defines which state fields should be animated and how when the view changes from one state to another. We will start with a similar scene we prepared at the beginning of this tutorial:StateAnimationExample.xml
<StateAnimationExample>
    <UserInterace>
        <Group Spacing="10">
            <Button Text="Change State" Click="ChangeState" />
            <Region Width="100" Height="100" BackgroundColor="Red" />
        </Group>
    </UserInterace>
    <EventSystem />
</StateAnimationExample>
Let's design two new states for our view: Left and Right. When the view is in the Left state we want the red square to be on the left and when it's in the Right state we want the square on the right side. We can do this by adding two new state fields to our view:
<StateAnimationExample Left-Region.Offset="-200,0,0" Right-Region.Offset="200,0,0" >
    <UserInterace>
        <Group Spacing="10">
            <Button Text="Change State" Click="ChangeState" />
            <Region Id="Region" Width="100" Height="100" BackgroundColor="Red" />
        </Group>
    </UserInterace>
    <EventSystem />
</StateAnimationExample>
Next we add a button click handler that toggles the state of our view between Left and Right:
StateAnimationExample.cs
public class StateAnimationExample : View
{
    public void ChangeState()
    {
        if (State == "Right")
        {
            SetState("Left");
        }
        else
        {
            SetState("Right");
        }
    }
}
If you run the scene and click on the button you should see the square start out in its default state and when you click on the button it toggles between right and left.
To animate between the Left and Right states we need to add two StateAnimation views:
<StateAnimationExample Left-Region.Offset="-200,0,0" Right-Region.Offset="200,0,0" >
    ...

    <StateAnimation From="Any" To="Right">
        <Animate Field="Region.Offset" Duration="500ms" EasingFunction="QuadraticEaseOut" />
    </StateAnimation>

    <StateAnimation From="Any" To="Left">
        <Animate Field="Region.Offset" Duration="500ms" EasingFunction="QuadraticEaseOut" />
    </StateAnimation>

</StateAnimationExample>
To create the state animation we do the following:
-
We create a StateAnimation view and set which state change it applies to:
<StateAnimation From="Any" To="Right">
This state animation is to be applied when the view changes state from anything to Right.
-
Next we specify which field should be animated and how by adding an Animate field:
<Animate Field="Region.Offset" Duration="500ms" ...
Note that we don't need to specify From and To values as we did with the ViewAnimation example. This is because the From and To values are derived from the state fields we've already defined.
-
We do the same thing for the left state animation.

Creating Animations in Code
To create animations in code you can use the ViewFieldAnimator class. Creating animations in code can be useful if the parameters of your animation need to adjust to runtime changes in data. Here is to create a new animation in code:
    var offsetAnimator = new ViewFieldAnimator();

    // set up animation
    offsetAnimator.EasingFunction = EasingFunctionType.QuadraticEaseOut;
    offsetAnimator.Field = "Offset"; // the field that is to be animated
    offsetAnimator.From = new ElementMargin();
    offsetAnimator.To = new ElementMargin(x, y, 0, 0); // x and y set during runtime
    offsetAnimator.Duration = 0.2f; // duration in seconds
    offsetAnimator.TargetView = MyRegion; // the view whose Offset field is to be animated

    // start animation
    offsetAnimator.StartAnimation();
When creating animation in code you need to manually update the animation each frame:
    public void Update()
    {
        offsetAnimator.Update();
    }